Autumn Art Activities for Children
Autumn is a fantastic time for children. The falling leaves and fabulous colours will inspire almost every child to undertake an art activity whether it is painting, sticking, designing or modelling.
Here are a couple of autumn art and craft ideas suitable for any child over 3 years old (with adult supervision).
Starting Your Autumn Art Activities
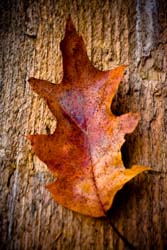
A fabulous start to any of these activities for children is to pull on Wellington boots and a warm coat and head out into the garden to collect the leaves. To burn off energy, start with making piles of leaves and jumping into them.
Then collect the leaves with the best shapes and colours and any other interesting bits and pieces such as fir cones, acorns etc. and take inside to start your artwork.
Autumn Wreath
You will need:
- Cardboard ring – for a small ring take a paper plate and cut a circle out of the middle or, for a larger ring, cut a ring shape out of the side of a cardboard packing box (an job for the grown ups!)
- Glue – PVA craft glue should be fine
- Leaves, acorns, small fir cones - ideally collected on a dry day
- Piece of string or ribbon
- Needle & thread or stronger glue (optional)
- Tissue paper in an autumn colour (optional)
To make:
1 Decide where you are planning to hang the finished wreath. If it is at a window, you will probably want to decorate both sides. If it is on a door or wall, then decorating one side will be sufficient.
2 Cover your cardboard with the tissue paper – so that none of the cardboard base will show through (optional).
3 To make a loop which can be used to hang your wreath when it is finished, thread the string or ribbon through the centre of the ring, tie around the ring and then create a loop.
4 Choose your favourite leaves, acorns etc. and stick them onto the cardboard base with lots of glue.
5 Some of the larger items such as fir cones may be too heavy to be stuck down with the ordinary glue. You can either use the needle and thread to secure these heavier items to the ring by sewing through the ring and then winding the thread round the item. Alternatively, use a stronger glue. (Both jobs for a grown-up).
6 Leave your wreath to dry.
7 If you are decorating the other side as well, take care not to damage the leaves etc. on the first side as you complete the second side. As an alternative to decorating both sides, you could instead decorate two rings on one side each and stick them together at the end.
Hang your autumn wreath up and enjoy!
Leaf Mobile
 You will need:
- Two sticks of about 30cm (1ft) long. These can be twigs, canes etc.
- Autumn leaves – 12 or more leaves which will lie flat – preferably from a number of different trees
- String
- Cotton or (better) button thread
- Sewing needle
- Sticky back plastic - small roll or 12 pieces a bit bigger than each of the leaves
- Sequins, glitter or scraps of coloured paper (optional)
- Strips of crepe paper about 2cm wide in autumn colours (optional)
- Sticky tape
- Pencil
- Variety of sizes of circular plates & saucers - to draw round
- Leaf/tree identification book (optional)
- Screw hook to go into the ceiling
- scissors
1 Tie the two sticks into a cross with the string. This is the frame for the mobile. Add a loop of string to the top to hang the mobile from a hook in the ceiling.
2 Sort the leaves into different varieties and (optional) identify them from the leaf/tree identification book. Select the twelve bet for the mobile.
3 For each of the 12 leaves, use a plate which is a bit bigger than the leaf to draw round and cut out two circles from the sticky back plastic.
4 Take a leaf, peel the back off one of the two pieces of sticky back plastic which are the right size for that leaf and press the leaf onto the sticky side. Add the sequins, glitter or scraps of coloured paper around the leaf so that they stick to the plastic (optional).
5 Peel the backing off the other circle of sticky back plastic and press the two pieces together.
6 Repeat for each leaf so that you have 12 leaf circles
7 Divide the leaf circles into 4 piles of 3 each. Divide the larger leaf circles between each of the piles.
8 Using the needle and thread (a job for a grown up), take a pile of leaf circles and join one circle to another so that the three leaf circles hang in a column. Put the larger leaf circles at the bottom. Sew an additional piece of thread on at the top to attach to the frame for the mobile.
9 Repeat for the other three piles of leaf circles.
10 Attach one set of leaf circles from the end of each of the four arms of the mobile frame using sticky tape. Adjust the exact point on the frame to which you attach the leaf circles to ensure that when hung from the ceiling the mobile is balanced.
11 (Optional) Attach the strips of crepe paper using sticky tape so that they hang down from the mobile frame.
12 Screw the hook into the ceiling and attach the mobile.
Once your art work is finished, head back into the garden and enjoy the autumn sunshine. Find a range of child art activities on Spotty Green Frog.
![]()